






Build your own workshop trolley from aluminum profiles
Reading time approx. 7 minutes
A sturdy workshop trolley is extremely practical in garages, workshops, or hobby rooms. Tools, materials, machines, or cut-offs can be flexibly moved and placed exactly where you are working. Instead of buying a finished trolley, you can easily build your own workshop trolley from aluminum profiles.
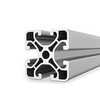
In this guide, we show you how to build a robust DIY workshop trolley from light 40 x 40 aluminum system profiles, angle sets, internal connectors, T-nuts, and heavy-duty castors. The great advantage is that you can adapt the dimensions, levels, castors, and accessories to suit your workshop.
Contents

Key Information at a Glance
-
+
The workshop trolley is built from 40 x 40 aluminum system profiles.
-
+
Angle sets, internal connectors, and T-nuts ensure stable connections.
-
+
With heavy-duty castors, the trolley remains mobile and flexibly usable.
-
+
You can customize the dimensions individually according to your workshop, storage space, and intended use.
DIY Video: Building a Workshop Trolley
In the video, you can see the step-by-step assembly: from system profiles and angle sets to castors and end caps.
Why a workshop trolley made of aluminum profiles?
A workshop trolley made of aluminum profiles is sturdy, flexible, and cleanly expandable. Thanks to the grooves of the system profiles, angles, castors, plates, brackets, or accessories can be easily screwed in and modified later if necessary.
A DIY workshop trolley is particularly practical if you don't want a standard solution. You can tailor the length, width, height, number of levels, and castors precisely to your workshop. This creates a mobile workbench, material trolley, or transport cart that fits your daily work routine.
The most important advantages:
- Sturdy construction from aluminum system profiles
- Individual dimensions possible
- Modularly expandable
- Mobile thanks to heavy-duty castors
- Clean screw connection with angle sets and internal connectors
- Ideal for workshops, garages, warehouses, hobby rooms, or assembly areas
Planning: What dimensions should the workshop trolley have?
Before you start building, you should define what you want to use the workshop trolley for. Should it primarily carry tools, move long profiles, hold machines, or serve as a mobile workbench? The length, width, height, and choice of castors depend on this.
For a long workshop trolley, several cross struts and additional vertical supports are suitable to prevent the structure from swaying unnecessarily. If heavy machines, metal parts, or large panels are to be transported, the profile dimensions, connection points, castors, and support surfaces must be designed accordingly.
Important: The load-bearing capacity of the finished workshop trolley depends not only on the profile size. The overall construction, span, connection technology, castors, flooring, load distribution, and quality of assembly are crucial.
Material list for the DIY workshop trolley
For the workshop trolley shown, aluminum system profiles, heavy-duty castors, and suitable connection parts were used. You can adjust the exact lengths to your desired dimensions.
- 19 × 40 x 40 light system profiles in various lengths
- 4 × heavy-duty castors
- 8 × M8 x 16 mm flat head screws
- 8 × washers
- 30 × angle sets
- 4 × internal connectors
- 4 × T-nuts
- 18 × end caps
The system profiles form the basic frame, the cross struts, and the vertical supports. The angle sets stabilize the corners and transitions. Internal connectors can be used where a concealed or particularly clean connection is desired. The end caps close the open profile ends and ensure a clean appearance.
Required Tools
You don't need a large arsenal of machines for assembly. Many steps can be done with simple workshop tools.

- Cordless drill
- Hex key or Allen key
- Hammer
- Pliers
- Tape measure
- Felt-tip pen for marking
If the profiles are ordered already cut to size, you save yourself the cutting and can start directly with the assembly.
Building a workshop trolley from aluminum profiles: Step by step
1. Sort profiles and check lengths
First, lay out all system profiles and sort them by length and position. This way, you can quickly identify which profiles are intended for long sides, cross struts, and vertical supports.
2. Screw on heavy-duty castors
To make the workshop trolley mobile, four heavy-duty castors are attached to the system profiles for the lower frame. Use suitable M8 x 16 mm flat head screws and washers. The castors should be securely seated in stable profile areas and evenly aligned.
For workshop use, castors with brakes are particularly practical. This allows you to move the trolley and then safely park it.


3. Prepare angle sets
The angle sets ensure stable corner and frame connections. Depending on the design, small webs or auxiliary parts can be removed so that the angle sits cleanly in the desired position.


4. Pre-assemble base frame
Start with the lower base frame. Align the long profiles parallel and connect them with the appropriate cross profiles. Make sure that the profiles fit snugly and the frame remains at right angles.
Angle sets are used for the corners and transitions. These can be positioned via the profile groove and then screwed in place.


5. Secure corners with internal connectors
At the outer corners of the workshop trolley, the vertical profiles are particularly stably integrated. For this purpose, internal connection brackets and additional angle sets are used. This combination ensures that the corner profiles are guided cleanly and the frame profiles are stably connected to each other.
First, insert the appropriate internal connectors or internal connection brackets into the profiles. Then, the angle sets are aligned at the corners and screwed in. Tighten the connections hand-tight first so that you can still align the profiles.
Check each corner to ensure that the vertical profiles are straight and the frame remains at right angles. Only when everything is neatly in place should the screws be fully tightened.


6. Mark and attach middle supports
The vertical profiles in the middle are attached with angle sets on both the left and right. Before you mount the angle sets, first mark the height at which the cross struts will later sit.
Use a tape measure and a felt-tip pen to accurately transfer the positions to the vertical profiles. It is important that the markings are at the same height on both sides. This ensures that the cross struts will later connect straight and the workshop trolley remains cleanly aligned.
After the markings are set, the angle sets are attached to the vertical profiles on the left and right. Align them with the markings and only tighten them hand-tight initially. Then, the cross struts can be inserted, aligned, and screwed in place.


Then check whether the middle supports are straight and the cross struts are evenly seated on both sides. Only when the alignment is correct should the angle sets be fully tightened.

7. Assemble upper frame
The upper frame connects the vertical supports and adds additional stability to the trolley. Align the profiles cleanly and check that the workshop trolley stands evenly.
If the trolley is later to carry worktops, boxes, or long materials, additional cross struts may be useful. These distribute the load better and reduce bending.

8. Attach end caps
Finally, the open profile ends are closed with end caps. This looks neat and protects the profile ends from dirt. It also reduces sharp or open edges on the construction.

9. Check all connections
After assembly, check all screws, angle sets, internal connectors, and castors. The trolley should stand straight, roll easily, and not twist. After the first uses, it is worth checking again, as connections can settle slightly under load.
Stability and Safety
A workshop trolley must be stable and suitable for the intended load. Stable castors, sufficient cross struts, and cleanly mounted connection points are particularly important. Heavy loads should be distributed as evenly as possible and not placed only on individual profile sections or edges.
When using, pay attention to the following points:
- Distribute load evenly on the trolley
- Keep the center of gravity as low as possible
- Use castors with brakes if the trolley serves as a workbench
- Regularly check screws and connecting parts
- Do not continue to use damaged castors or loosened connectors
- Do not move the trolley over uneven floors or edges with overload
Note: The maximum load capacity depends on profiles, connection technology, castors, size, and load distribution. If the workshop trolley is to carry heavy machines or very high loads, the construction should be checked and designed accordingly.
Matching products for your workshop trolley
Products for your DIY workshop trolley
For a stable workshop trolley, you can use 40 x 40 aluminum system profiles for the frame, suitable connectors for stable corner and frame connections, and accessories such as T-nuts and end caps. Make sure that the profile series, groove, connecting parts, and screws match.


Note: The load-bearing capacity of the workshop trolley results from the entire construction. Profile dimensions, span, connection technology, castors and load distribution must match the intended use.
Tips for Your DIY Workshop Trolley
- Plan the dimensions so that the trolley can be easily moved through doors and between shelves.
- Install additional cross braces for long trolleys.
- Use castors with brakes if the trolley also serves as a work surface.
- Close open profile ends with end caps.
- Check screws and connectors regularly.
- Add panels, boxes, hooks or holders as needed.
- Distribute heavy loads as evenly as possible.
Conclusion
A workshop trolley made of aluminum profiles is a practical DIY solution for workshops, garages and hobby rooms. Thanks to the system profiles, the trolley can be individually planned, securely screwed together and later expanded. With suitable castors, angle sets, T-nuts and end caps, you can create a mobile helper that perfectly suits your projects.
FAQ: Building your own workshop trolley from aluminum profiles
Can you build a workshop trolley from aluminum profiles yourself?▸
Yes, a stable workshop trolley can be easily built yourself with aluminum system profiles, suitable connectors and heavy-duty castors. Important are careful planning, suitable connecting parts and a load that matches the construction.
Which profiles are suitable for a workshop trolley?▸
For a stable workshop trolley, 40 x 40 aluminum system profiles are particularly suitable. They offer a solid basis for frames, cross braces and vertical supports. The appropriate profile series depends on the size, load and intended use.
Which castors does a workshop trolley need?▸
For a workshop trolley, robust castors should be used that match the planned load. Castors with brakes are particularly practical if the trolley is to stand securely or be used as a mobile work surface.
How stable is a workshop trolley made of aluminum profiles?▸
The stability depends on the profile dimensions, span, number of cross braces, connection technology, castors and load distribution. For heavy loads, the construction should be reinforced accordingly and carefully checked.
Can I expand the workshop trolley later?▸
Yes, that is one of the great advantages of system profiles. Holders, panels, shelves, hooks or additional struts can be added later via the profile groove.
Do I need special tools?▸
For assembly, a cordless screwdriver, Allen key, hammer, pliers, tape measure and felt-tip pen are usually sufficient. If the profiles are ordered in the correct size, no cutting is necessary.
Can I put a workbench on the workshop trolley?▸
Yes, a suitable top can make the trolley usable as a mobile workbench. It is important that the top, fastening and substructure match the load.
What do I need to consider for heavy loads?▸
Heavy loads should be distributed evenly. In addition, castors, profiles, connectors and screws must be suitable for the load. The center of gravity should be as low as possible so that the trolley does not tip over.

Author of this article
ABOUT
MIKE
- Over 15 years of hands-on experience in metalworking and the trades
- Strong technical intuition
- Develops practical, sustainable solutions
- Expert customer support and consulting
