






Build an Aluminum Surfboard Rack – DIY Guide for Campers & Vans
Reading time approx. 7 minutes
Anyone traveling with a campervan or RV knows the problem: surfboards, SUPs, or board bags take up a lot of space inside. A sturdy aluminum surfboard holder offers a practical solution. Individual holders can be built from aluminum system profiles that are light, robust, and securely bolted.
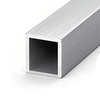
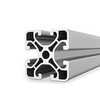
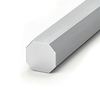
In this guide, we'll show you how to build your own surfboard holder for your campervan using 30x30 aluminum system profiles, suitable T-nuts, and M8 connections. The profiles are available in silver or black. Depending on the design, the construction can be suitable for existing rear racks, roof rack extensions, or individual van life projects. When attaching to doors, door frames, or the vehicle body, load capacity, legality, and mounting points must be checked with particular care.
If you want to further expand your camper with aluminum profiles, you can find additional ideas in our article on campervan conversion.
Table of Contents

The most important things in brief
-
+
The surfboard holder is built from 30x30 aluminum system profiles.
-
+
Matching T-nuts with thread allow for flexible screwing.
-
+
The profile dimension alone does not guarantee a safe holder construction. The decisive factors are the profile variant, span width, connection technology, and mounting points.
-
+
Padded supports, stable strap points, and secure load restraint are important.
Why an aluminum surfboard holder?
An aluminum surfboard holder is practical if you want to transport your board outside the vehicle. Especially in a campervan, space is tight. An externally mounted holder can create more space inside, but must be designed and secured in such a way that vehicle dimensions, visibility, lighting, license plate, and driving behavior are not unduly affected.
The main advantages:
- light and stable construction
- corrosion-resistant and weatherproof
- individually adaptable
- modularly expandable
- clean appearance thanks to black or silver system profiles
- suitable for surfboards, SUPs, longboards, or board bags
Aluminum is particularly practical for mobile applications because it offers a good weight-to-stability ratio. The groove in the profile allows you to position accessories flexibly and retrofit them if necessary.
Further conversion ideas for campervans, furniture modules, and rack systems can be found in the article Campervan Conversion with Aluminum Profiles.
Planning & Area of Application
Before you start building, you should determine where the surfboard holder will be mounted. Common applications include existing rear racks, roof racks, side rack systems, or individually constructed van life setups on the campervan.
When attaching to rear doors, door frames, or directly to the vehicle body, load capacity, legality, mounting points, lever arms, and hinge loads must be checked with particular care.
Important questions before construction:
- How long and heavy is the surfboard?
- Should a single board or multiple boards be transported?
- Will the board be stored horizontally or vertically?
- Are there existing mounting points on the vehicle or rack?
- Will tail lights, license plates, and doors remain freely accessible?
Also check the permissible roof load, the load capacity of the rack system, and for rear racks, the tongue weight of the trailer hitch if applicable. These values must not be exceeded by the holder, board, accessories, and straps combined.
When rear-mounted, taillights, license plates, rearview camera, and doors must not be covered or blocked. If license plates or taillights are covered by the holder or board, a duplicate license plate and an additional lighting unit may be required.
Important: A profile dimension such as 30x30 mm is only one component of the construction. It does not replace a check of the entire holder, including mounting points, lever arms, connection technology, board weight, and dynamic loads during travel.
Safety note: This guide is a DIY example. The actual load capacity depends on the construction, mounting points, vehicle, board weight, and assembly quality. Carefully check all connections and only use the holder if the construction is safe and suitable for road traffic.
Material List for the Surfboard Holder
For a simple and stable construction, you will need the following materials:
- 2 × aluminum system profile 30x30 in silver or black, 1600 mm each
- several suitable T-nuts for slot 8 / series 30 with M8 thread
- M8 screws suitable for mounting
- washers, threadlocker, or self-locking nuts depending on the connection
- angle connectors or mounting plates depending on the mounting point
- rubber buffers or pipe insulation for padding
- tensioning straps for securing the surfboard
- optional: end caps for the profile ends
- optional: black cover profiles for open slots
The two 1600 mm profiles form the main struts of the holder. Holders, crossbeams, strap hooks, or support points can be flexibly positioned using suitable T-nuts with M8 thread.
Important: Not every 30x30 system profile automatically has the same groove geometry. Make sure that T-nuts, screws, and accessories exactly match the profile system used.
Matching Products for Your Surfboard Holder
Products for Your Aluminum Surfboard Holder
For a DIY surfboard holder on your campervan, you can use 30x30 aluminum system profiles as main struts. Depending on the optics and project, the profiles are available in silver or black. Matching T-nuts and system profile accessories help with flexible mounting points, clean finishes, and additions. Make sure that the profile, groove, T-nut, screws, and accessories fit exactly together.


Note: A general load capacity for the finished holder cannot be derived from the profile dimension alone. The decisive factors are the profile variant, span width, lever arm, connection technology, mounting points, and dynamic loads during travel.
Which profiles are suitable?
For many light DIY campervan applications, 30x30 aluminum system profiles may be suitable. However, whether the profiles are sufficient for the specific surfboard holder depends on the board weight, overhang, mounting points, driving speed, and occurring wind and vibration forces.
A general load capacity for a specific vehicle holder cannot be derived from the profile dimension alone. The decisive factors are the profile variant, span width, lever arm, connection technology, mounting points, and dynamic loads during travel.
The 30x30 profiles offer a practical basis for individual holders, as accessories can be flexibly positioned via the groove. For more heavily loaded constructions, large overhangs, or multiple boards, the construction should be reinforced accordingly or individually tested.
| Component | Use | Note |
|---|---|---|
| 30x30 Aluminum System Profile | Main struts of the holder | available in silver or black, check load capacity on a project-specific basis |
| T-nut Slot 8 / Series 30 with M8 thread | Sliding fastening in the profile groove | must exactly match the profile system used |
| M8 screws | Bolting of holders and accessories | Choose length suitable for the connection |
| Rubber buffers / padding | Support surface for surfboard or board bag | protects board and profile from friction |
If you mount the holder on the rear, side, or roof, the design should be planned so that the board not only supports its own weight but is also secured against wind, braking forces, vibrations, and lateral slipping during travel.
You can also find more information on suitable profiles in our article on Campervan Conversion with Aluminum Profiles.
Building an Aluminum Surfboard Holder – Step by Step
1. Determine the position on the vehicle
First, determine where the holder will be mounted. Check that the rear door, taillights, license plate, and rearview camera remain clear. For rear mounting, there should also be enough clearance from the ground and the bumper.
2. Align the profiles
Align the two 30x30 aluminum system profiles parallel to each other. Depending on the construction, they can be used vertically at the rear or horizontally as support or carrier struts.
3. Insert T-nuts
Slide the appropriate T-nuts for slot 8 / series 30 with M8 thread into the profile grooves. Place them where mounting brackets, support points, strap hooks, or mounting plates are to be bolted later.
4. Install mounting points
Bolt the profiles to suitable brackets or existing mounting points on the vehicle. Use appropriate M8 screws, washers, and, depending on the connection, threadlocker or self-locking nuts. Tighten all connections firmly and check the fit of the construction.
5. Pad the support surfaces
To prevent damage to the surfboard or board bag, all contact surfaces should be padded. Suitable materials include rubber buffers, pipe insulation, or weather-resistant foam pads.
6. Define strap points
Plan for at least two secure strap points. The tensioning straps should firmly pull the board against the support without damaging it. Make sure that the straps do not run over sharp edges.
Strap points should not only hang on individual small parts but should ideally be guided on stable profile sections, cross struts, or suitable lashing points.
7. Place and secure the surfboard
Place the board or board bag on the padded supports. Tighten the straps evenly and check if the board can still move. Before each trip, the securing should be checked again.
8. Test Drive and Re-inspection
After assembly, take a short test drive and then check all screws, straps, and support points. Especially with new constructions, connections can settle slightly after the first few kilometers.
Properly Securing Your Surfboard
Load securing is the most important aspect of a surfboard holder on a camper. When transported on the roof or at the rear, wind, braking forces, and vibrations act on the board. Therefore, the construction should not only bear the weight but also secure against lateral slipping and tipping.
Legal Notice: In Germany, according to § 22 StVO, loads must be secured in such a way that they cannot slip, fall off, or cause avoidable noise, even during emergency braking or sudden evasive maneuvers.
Important points:
- use at least two suitable lashing straps
- do not twist straps
- pad contact surfaces
- no sharp edges on straps or board
- route strap points through stable profile sections, cross struts, or suitable lashing points if possible
- do not exclusively secure to individual small parts or unfavorably loaded slot nuts
- re-check after a short drive
- observe permissible vehicle dimensions, visibility areas, and overhangs
Fins should not rest on the carrier or on sharp edges. Position the board so that it rests flat and padded, and the fins are not stressed.
Also, make sure that the vehicle with holder and board does not exceed the permissible dimensions. Especially with side or rear mounting, width, overhang, and marking can become relevant.
The holder is suitable not only for classic surfboards but also for SUP boards, longboards, or board bags, depending on the design.
Tips for Long Durability
- clean coated profiles regularly
- close open profile ends with end caps
- protect grooves from dirt with cover profiles
- retighten screws regularly
- replace padding when worn
- store lashing straps dry
- check connections before longer journeys
For a particularly clean look, you can close open profile grooves with cover profiles. This also protects against dirt and moisture.
DIY Surfboard Holder vs. Ready-Made Holder
| Feature | DIY from Aluminum Profiles | Ready-Made Holder |
|---|---|---|
| Customizability | very high | limited |
| Appearance | individual and clean | predefined |
| Assembly Effort | medium | lower |
| Expandability | very good | model-dependent |
| Costs | depending on material and accessories | often higher for special solutions |
A DIY surfboard holder made of aluminum profiles is particularly worthwhile if you need an individual solution, want to use existing attachment points, or want to expand the holder later.
FAQ about the Aluminum Surfboard Holder
Can you build an aluminum surfboard holder yourself?▸
Yes, with aluminum system profiles, slot nuts, and M8 screws, an individual surfboard holder for campers, vans, motorhomes, or cars can be easily built yourself. Stable fastening, padded supports, and secure strap securing are important.
Which aluminum profiles are suitable for a surfboard holder?▸
For many light DIY camper applications, 30x30 aluminum system profiles may be suitable. Whether they are sufficient in a specific case depends on board weight, overhang, attachment points, and the wind and vibration forces occurring.
What length should the profiles be?▸
In this guide, two 30x30 aluminum system profiles, each 1600 mm long, are used. The appropriate length depends on the vehicle, the board, and the desired mounting position.
How can I attach my surfboard to the motorhome?▸
In a motorhome, a surfboard can be attached externally to a suitable rear carrier, roof rack, or a stably designed aluminum profile construction. It is important that the board rests on padding and is secured against slipping with at least two lashing straps.
How do you transport a surfboard on a car roof?▸
On a car roof, a surfboard should be transported on a suitable roof rack, crossbar system, or specially designed attachment system. The board must rest on padding and be secured with sturdy lashing straps. Fins should not rest on the carrier or on sharp edges.
Do I need a roof rack for a surfboard?▸
A fixed roof rack, suitable for the vehicle, is usually the more robust and better plannable solution for regular or longer transports. Manufacturer's specifications, permissible roof load, and secure fastening are always decisive.
Can I transport a surfboard without a roof rack?▸
Basically, a roof rack is not always mandatory. Without a fixed roof rack, only suitable soft racks or special attachment systems are an option. The board must be secured in such a way that it cannot slip or fall off, even during braking and evasive maneuvers.
How is the surfboard attached to the aluminum holder?▸
The surfboard should lie on padded supports and be secured with at least two lashing straps. The straps must be tight but should not damage the board. There should always be a soft protective layer between the board and the aluminum profile.
Can I also transport a SUP board?▸
Yes, depending on size and weight, the construction can also be used for SUPs or board bags. Make sure that the holder is wide enough, the board rests securely, and the attachment points are sufficiently stable.
Can a surfboard be damaged during transport?▸
Yes, if it is transported without padding, with straps pulled too tight, or on sharp edges. Therefore, all contact surfaces should be padded and the straps tightened evenly.
How fast can you drive with a surfboard on the roof?▸
The permissible speed depends on the carrier system, vehicle, and manufacturer's specifications. Basically, you should drive more cautiously with a surfboard on the roof, pay attention to strong crosswinds, and regularly check the straps.
What do I need to consider when mounting at the rear of the camper?▸
Taillights, license plates, rearview camera, and doors must not be covered or blocked. If license plates or taillights are covered, a repeating license plate and an additional lighting unit may be required.
What do I need to pay attention to regarding roof load or rear carrier?▸
Check the permissible roof load, the load capacity of the carrier system, and, for rear carriers, the tow bar's nose weight if applicable. Holder, board, accessories, and straps together count towards the total load.
Does an aluminum surfboard holder rust?▸
Aluminum does not rust like steel but forms a protective oxide layer. Therefore, it is well suited for outdoor use. However, corrosion can still occur in a salty environment, with damaged coating, or in contact with unsuitable metals. Screws and accessories should also be corrosion-resistant.
What are the advantages of an aluminum surfboard holder?▸
An aluminum surfboard holder is lightweight, sturdy, weatherproof, and flexibly adaptable. Due to the groove in the system profiles, attachment points, strap holders, or supports can be moved or added later.
Do I need special tools?▸
For assembly, usually an Allen key, wrench, measuring tape, and possibly a drill are sufficient. If the profiles are already ordered in the correct size, cutting is not necessary.

Author of this article
ABOUT
MIKE
- Over 15 years of hands-on experience in metalworking and the trades
- Strong technical intuition
- Develops practical, sustainable solutions
- Expert customer support and consulting
