






Aluminium garage for your robotic lawn mower
Reading time approx. 7 minutes
A robotic lawnmower saves time, keeps the lawn evenly maintained, and automatically returns to its charging station after work. To provide lasting protection for your device, a suitable garage is worthwhile. A robotic lawnmower garage made of aluminum is particularly durable and modern.
In this guide, we'll show you how to build an aluminum garage for your robotic lawnmower yourself. You'll learn about the advantages of aluminum, what materials you need, and what to consider regarding dimensions, location, construction, ventilation, signal behavior, and winter storage.
Contents

Key Highlights
-
+
An aluminum garage protects your robotic lawnmower from rain, UV radiation, dirt, and leaves.
-
+
Aluminum does not rust like steel, forms a protective oxide layer, and is well-suited for outdoor use.
-
+
For compact robotic lawnmower garages with a lightweight roof, 20 x 20 mm can be a practical profile size; for larger spans, heavier roofs, or higher loads, 30 x 30 mm may be useful.
-
+
Important considerations include sufficient space for the charging station, good ventilation, and manufacturer's instructions for winter storage.
Why an aluminum robotic lawnmower garage?
A garage reduces direct weather influences on your robotic lawnmower and better protects sensitive components such as sensors, charging contacts, battery, and plastic casing from continuous outdoor exposure.
The main advantages of an aluminum robotic lawnmower garage:
- Weather protection: Protection from rain, snow, UV radiation, leaves, and dirt
- Does not rust like steel: Aluminum forms a protective oxide layer and is therefore very weather-resistant
- Durable: stable and low-maintenance with suitable construction and fasteners
- Lightweight: easier to transport and assemble than many heavy metal solutions
- Easy to clean: usually just requires occasional cleaning with water and a soft cloth
- Modern look: complements clearly designed gardens, patios, and modern garden technology
Particularly practical: The garage can be designed to integrate the charging station. The robotic lawnmower then automatically returns to its garage and continues charging in a protected environment.
Important: A garage protects against direct weather but does not replace proper winter storage. For frost, battery care, and extended periods of inactivity, you should always follow your robotic lawnmower's manufacturer's instructions.
Location & Planning of the Robotic Lawnmower Garage
Before you build the garage, you should meticulously plan its location. An ideal spot is a flat, easily accessible area near the charging station. The robotic lawnmower must be able to drive in and out straight without getting caught on edges, walls, or cables.
Important points for planning:
- Flat and firm ground
- Position near the charging station
- Clear entry and exit for the robotic lawnmower
- Sufficient space for the robot, charging station, and cables
- Good ventilation to prevent heat buildup
- Stable fastening for wind-prone locations
If you want to neatly separate the area around the garage from the lawn or flowerbed, a sturdy lawn edging can be useful. This keeps the location tidy, the robotic lawnmower's entrance clear, and the garage visually integrated into the garden.
Tip: Precisely measure your robotic lawnmower, including the charging station. Also, plan for side clearance so the robot can dock and exit without issues. The garage should not be built too narrowly.
Also, observe the manufacturer's assembly instructions. Many models have specific requirements for the position of the charging station, the clear space in front of it, cable routing, and the approach path.
Practical tip: After assembly, test whether the robotic lawnmower enters and exits reliably. Depending on the model, boundary wire, guide wire, or radio navigation, cramped metal constructions can be unfavorable.
Material List for an Aluminum Robotic Lawnmower Garage
For a stable DIY aluminum garage, you will need the following materials, depending on the desired construction method:
- Aluminum profiles for the basic frame
- Aluminum angles or corner connectors for stabilization
- Aluminum sheets for side walls and roof
- Screws and nuts, ideally corrosion-resistant and suitable for aluminum
- Washers and suitable fasteners
- Optional: Hinges for a hinged roof
- Optional: Rubber feet or ground anchors
- Optional: End caps for open profile ends
Note: When combining different metals, potential contact corrosion should be considered. Therefore, use suitable fasteners for outdoor use.
In addition, you will need tools:
- Measuring tape and pen
- Square or spirit level
- Drill for aluminum
- Wrench or Allen key
- Metal saw or custom cutting service
If you order profiles and sheets cut to size directly, you save time on cutting and get clean edges for faster assembly.
Which aluminum products are suitable?
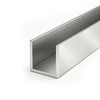
For a robotic lawnmower garage, aluminum profiles, aluminum angles, and aluminum sheets are particularly suitable. The profiles form the load-bearing frame, while the sheets enclose the roof and side walls.
| Aluminum Product | Use | Advantage |
|---|---|---|
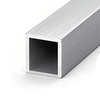
| Aluminum System Profiles | Base frame, side frames, roof beams, and crossbeams | Lightweight, stable, and easy to screw together |
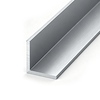
| Aluminum Angles or Corner Connectors | Corners and connections | Stabilizes the frame and ensures clean edges |
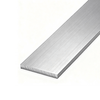
| Aluminum Sheets | Roof, side walls, and back wall | Can be ordered to size and are well-suited for enclosed surfaces |
| End Caps | Open profile ends | Improve appearance and safety |
For a particularly modern look, the garage can be built from black or anodized profiles. You can find more about surfaces in the article Powder Coating and Anodizing.
Which profile size is suitable for a robotic lawnmower garage?
For a compact robotic lawnmower garage, an aluminum system profile of 20 x 20 mm can be a practical starting point. It is lightweight, easy to work with, and often sufficient for short spans and a well-connected structure for a lightweight roof.
However, profile size alone is not the decisive factor. Garage dimensions, free spans, roof weight, connectors used, ground fastening, and wind and snow loads also influence stability.
Guidance for profile selection
- 20 x 20 mm: a practical solution for compact robotic lawnmower garages with lightweight roofs and short spans.
- 30 x 30 mm: useful for larger dimensions, longer free spans, heavier roofs, or if a particularly rigid construction is desired.
- 40 x 40 mm: usually not necessary for a typical compact robotic lawnmower garage; more interesting for larger or more heavily loaded constructions.
Example dimensions for a compact robotic lawnmower garage
As a rough guide, a garage with external dimensions of approximately 800 x 900 x 500 mm can be planned (800 mm width, 900 mm depth, and 500 mm height).
Important: These dimensions are just an example. Measure your robotic lawnmower and charging station precisely beforehand and observe the manufacturer's specifications for entry, clear space, cable routing, and charging station position.
The following cutting list is based on a clearly defined example construction:
- External width: approx. 800 mm
- External depth: approx. 900 mm
- External height: approx. 500 mm
- Profile cross-section: 20 x 20 mm
- Cross profiles sit between the side longitudinal profiles
- Vertical supports sit between the lower and upper frames
- The entrance remains open at the bottom
For an external width of 800 mm, the cross profiles located between two 20 mm longitudinal profiles result in:
800 mm − 20 mm − 20 mm = 760 mm
For an external height of 500 mm, with a lower and upper frame height of 20 mm each, the intermediate vertical supports result in:
500 mm − 20 mm − 20 mm = 460 mm
Note: With a different corner connection or if the vertical profiles are mounted on the outside instead of between the frame profiles, the cutting dimensions will change accordingly.
Example cutting list for a robotic lawnmower garage made of 20 x 20 mm profiles
The following list describes a simple rectangular example construction with an open front area and approximate external dimensions of 800 x 900 x 500 mm.
| Component | Quantity | Example Dimension | Use / Note |
|---|---|---|---|
| Aluminum system profile 20 x 20 mm | 4 pieces | 900 mm | two upper and two lower longitudinal beams on the left and right side |
| Aluminum system profile 20 x 20 mm | 3 pieces | 760 mm | top front, top rear, and bottom rear; the front area remains open at the bottom |
| Aluminum system profile 20 x 20 mm | 4 pieces | 460 mm | vertical supports between the lower and upper frames; together with the two 20 mm frame profiles, this results in approx. 500 mm external height |
| Aluminum system profile 20 x 20 mm | 1–2 pieces | 760 mm | additional crossbeams under the roof to reduce the free span |
| Aluminum sheet | 1 piece | approx. 900 x 1000 mm | example roof with approx. 50 mm overhang on all four sides for a frame of 800 x 900 mm |
| Angle connectors or corner connectors | as needed | suitable for the profile | connection of the profiles; quantity and design depend on the connection system used |
| Screws and T-slot nuts | as needed | suitable for the slot | for connectors, angles, roof fastening, and accessories |
| End caps | as needed | 20 x 20 mm | clean finish for freely accessible profile ends |
Note on open entrance: In this example, no lower crossbeam is deliberately provided at the front. A profile in the entrance area can interfere depending on the robotic lawnmower, charging station, and ground height. The side lower longitudinal profiles should therefore be securely connected to the rest of the structure and, if necessary, fastened to the ground.
Roof overhang: Even with a visually flat roof, the roof panel should be mounted slightly sloped to the rear or side so that rainwater can drain off. The slope can be created, for example, by appropriately adjusted fastening or suitable spacer elements.
Practical recommendation: 20 x 20 mm profiles are a plausible starting point for this compact example construction with a lightweight roof. However, a general load capacity cannot be derived from this. For heavier roof panels, larger spans, stronger wind or snow loads, 30 x 30 mm profiles or additional cross or diagonal bracing may be useful.
Suitable products for your robotic lawnmower garage
Recommended materials
For a compact robotic lawnmower garage, we primarily recommend aluminum system profiles, suitable connectors, and a lightweight roof panel. The exact selection depends on the size, roof material, and desired stability.


Building a Robotic Lawnmower Garage from Aluminum – Step by Step
1. Measure the Robotic Lawnmower and Charging Station
First, measure the length, width, and height of your robotic lawnmower and the charging station. Allow sufficient clearance all around. The robot should be able to enter and exit without touching the side walls or roof.
2. Prepare the Location
Choose a level location near the charging station. Remove stones, leaves, and unevenness. If necessary, you can prepare a small base from paving stones, a concrete slab, or patio slabs.
3. Cut Aluminum Profiles
Cut the profiles to the desired length or order them cut-to-size directly. If you are basing your design on the example construction with external dimensions of 800 x 900 x 500 mm, note the installation position of the profiles: Cross profiles placed between two 20 mm profiles will be correspondingly shorter. The same applies to vertical supports if they are mounted between the bottom and top frames.
4. Assemble the Base Frame
Connect the cut profiles with brackets, corner connectors, or suitable connecting elements. Use a spirit level or a square to check that the structure is straight and at right angles.
Tip: Keep the lower front area as clear as possible so that no profile obstructs the robotic lawnmower's entry or the charging station.
5. Mount the Side Walls
Attach the aluminum plates to the sides. Depending on the desired design, you can fully enclose the sides or leave them partially open to allow for sufficient air circulation.
6. Attach the Roof
The roof protects the robotic lawnmower from rain, sun, and leaves. It can be firmly screwed down or designed as a hinged roof. A hinged roof facilitates maintenance, cleaning, and access to the charging station.
Plan for a slight roof overhang. Even with a visually flat roof, the roof surface should be slightly sloped so that rainwater can reliably drain to the back or side.
7. Install the Charging Station
Position the charging station so that the robotic lawnmower can drive straight in. Ensure clean cable routing and that no cables are in the path of travel. Cables, plug connections, and the power supply should be protected from moisture and installed securely according to the manufacturer's specifications.
Also, observe the manufacturer's installation instructions regarding the position of the charging station, the approach path, and the clear area around the station.
8. Secure the Garage
In windy locations, it may be advisable to secure the garage to the ground. Ground anchors, screws, or a solid base plate are suitable for this.
9. Test Functionality
Allow the robotic lawnmower to drive into and out of the garage for a test run. Check that sensors, charging contacts, signal routing, and travel paths remain clear.
Practical Tip: During the test, check whether the robotic lawnmower docks reliably, exits smoothly, and whether there are any signal or navigation problems. If problems occur, you should move the garage, enlarge the clear area, or check the manufacturer's specifications for the charging station.
Robotic Lawnmower Garage with a Flat Roof
A robotic lawnmower garage with a flat roof is particularly easy to build and fits well into modern gardens visually. The flat roof can consist of an aluminum plate and be slightly sloped backward or to the side so that rainwater can drain off.
Advantages of a flat roof:
- simple construction
- modern appearance
- good coverage of the charging station
- easily implemented with aluminum plates
- optionally hinged for maintenance and cleaning
Important: Even with a flat roof, water should be able to drain. Therefore, plan for a slight incline so that puddles do not form on the roof.
In regions with a lot of snow, the roof should be designed to be sufficiently stable or regularly cleared of snow. Leaves should also not remain on the roof permanently so that water can drain well.
Tips for Protection & Long Durability
- Do not build the garage too narrow so that the robot can dock safely
- Do not completely seal the garage airtight
- Plan for side openings or an open front area for ventilation
- Keep the lower front area as free as possible from obstructing cross profiles
- Protect cables, plug connections, and power supply from moisture according to manufacturer's instructions
- Plan the roof with a slight incline
- Regularly check screws and close open profile ends with end caps
- Regularly remove leaves, dirt, and snow
- Observe manufacturer's instructions for the charging station and storage
- Plan for lockable elements if needed
If you want additional security, you can supplement the garage with a lockable flap or a stable ground anchor. This way, the robotic lawnmower can be further secured against quick access. However, the garage does not replace complete theft protection.
Robotic Lawnmower Garage from Aluminum vs. Wood or Plastic
| Property | Aluminum | Wood | Plastic |
|---|---|---|---|
| Weather resistance | very good | maintenance-dependent | medium to good |
| Maintenance effort | low | high | low |
| Lifespan | high with suitable construction and appropriate connecting elements | dependent on wood protection | dependent on UV resistance |
| Appearance | modern | natural | functional |
| DIY adaptation | very good | good | limited |
An aluminum robotic lawnmower garage is particularly useful if you are looking for a durable, modern, and low-maintenance solution. Wood looks more natural but requires more care. Plastic is lightweight but can age faster due to UV radiation, depending on its quality.
FAQ on Robotic Lawnmower Garages made of Aluminum
Why does a robotic lawnmower need a garage?▸
A garage protects the robotic lawnmower from rain, snow, UV radiation, dirt, and leaves. This helps to protect the housing, sensors, charging contacts, and charging station from direct weather. For frost, battery care, and winter storage, you should also consult the manufacturer's instructions.
Can you build a robotic lawnmower garage yourself?▸
Yes, with aluminum profiles, aluminum plates, brackets, and screws, an individual garage for the robotic lawnmower can be easily built yourself. Important factors are suitable dimensions, stable connections, and a clear entrance.
What materials are suitable for a robotic lawnmower garage?▸
Aluminum system profiles for the frame, aluminum plates for the roof and side walls, and corrosion-resistant screws are suitable. For compact constructions with a lightweight roof, 20 x 20 mm can be a practical profile size; for larger spans or higher loads, 30 x 30 mm may be useful.
Is a 20 x 20 mm profile sufficient for a robotic lawnmower garage?▸
For a compact robotic lawnmower garage with a lightweight roof, a 20 x 20 mm aluminum system profile can be a practical solution. However, crucial factors also include spans, connectors, roof weight, ground attachment, and wind and snow loads. Additional crossbeams can significantly stiffen the structure.
Which profile size should I choose for a robotic lawnmower garage?▸
For compact constructions with a lightweight roof, 20 x 20 mm can be a good starting point. For larger dimensions, longer unsupported spans, heavier roof panels, or higher loads, 30 x 30 mm may be suitable. The profile size should always be considered together with the entire construction.
What dimensions should a robotic lawnmower garage have?▸
For many models, an outer dimension of about 800 x 900 x 500 mm can serve as a rough guide. However, the robot, charging station, entry situation, and manufacturer's specifications are always decisive. When planning the exact cut, it is also necessary to consider how the individual profiles are arranged at the corners.
Why are the cross profiles for an external width of 800 mm only 760 mm long?▸
In the example construction, the cross profiles are located between two lateral 20 mm profiles. Therefore, twice 20 mm is subtracted from the desired external width of 800 mm. This results in a cutting length of 760 mm. The dimensions may differ with a different corner construction.
Why are the vertical supports for an external height of 500 mm only 460 mm long?▸
In the example construction, the vertical supports are located between a lower and an upper 20 mm frame profile. Therefore, twice 20 mm is subtracted from the desired external height of 500 mm. The supports are accordingly 460 mm long.
Is aluminum better than wood for a robotic lawnmower garage?▸
Aluminum is easier to maintain and very weather-resistant. Wood looks more natural but needs regular protection or treatment to last long.
Is a robotic lawnmower garage with a flat roof suitable?▸
Yes, a garage with a flat roof is easy to build and visually modern. A slight incline is important so that rainwater can drain off. In regions with a lot of snow, the roof should be designed to be sufficiently stable or regularly cleared.
Can I build a garage for Worx, Husqvarna, Gardena, or Navimow?▸
Yes, a DIY aluminum garage can be custom-adapted to many robotic lawnmower models. The robot's dimensions, the charging station's position, manufacturer's specifications, and the entry direction are crucial.
Does the charging station have to be in the garage?▸
In most cases, it makes sense to integrate the charging station directly into the garage. This way, the robotic lawnmower automatically drives in protected and can charge there. Please observe the manufacturer's instructions for positioning the charging station.
Does the robotic lawnmower garage need ventilation?▸
Yes, good ventilation is important so that heat does not accumulate in summer and moisture can escape better. The garage should not be completely airtight. Side openings or an open front area are often useful.
Should the garage have a lower crossbeam at the front?▸
For a robotic lawnmower garage, an open entrance at the bottom is often more practical. A transverse profile can obstruct the path depending on the charging station, ground height, and robotic lawnmower. The side lower profiles should then be connected stably and, if necessary, secured to the ground.
Can you build a lockable robotic lawnmower garage?▸
Yes, depending on the construction, a lockable flap or an additional security mechanism can be integrated. This can help protect the robotic lawnmower against quick access. However, the garage does not replace complete theft protection.
Can a robotic lawnmower garage protect the robot outdoors in winter?▸
A garage protects against direct weather such as rain, leaves, and light snow loads. However, for frost, battery care, or longer periods of inactivity, you should observe the manufacturer's winter instructions. Many robotic lawnmowers should be stored dry and frost-protected in winter.
Can aluminum corrode in a robotic lawnmower garage?▸
Aluminum does not rust like steel but forms a protective oxide layer. This makes it very weather-resistant. However, under unfavorable conditions, such as contact corrosion or aggressive cleaning agents, aluminum can still be attacked.
Can an aluminum garage interfere with the robotic lawnmower's signal?▸
This depends on the model and the construction. In many cases, an open garage works without problems. After assembly, however, you should test whether the robotic lawnmower reliably finds its way to the charging station and whether there are any signal or navigation problems. Also, observe the manufacturer's instructions for positioning the charging station and the clear area around the station.

Author of this article
ABOUT
MIKE
- Over 15 years of hands-on experience in metalworking and the trades
- Strong technical intuition
- Develops practical, sustainable solutions
- Expert customer support and consulting
