






Build your own aluminum football goal – DIY guide with system profiles
DIY Football Goal: Build Your Own Goal in a Few Steps
Reading time approx. 7 minutes
Building your own aluminium football goal is the perfect solution for your garden, training, or leisure time. Instead of expensive ready-made goals, this guide provides you with a stable, durable, and customisable goal – exactly to your needs.
With aluminium system profiles (40x40 Slot 8), you can build a modern, rust-proof football goal that is easy to assemble and will last for many years. In this step-by-step guide, we'll show you what to look out for, what dimensions are suitable, and what materials you'll need.
Contents

The Essentials in Brief
-
+
Aluminium football goals are durable, rust-proof, and stable – ideal for garden and training.
-
+
With 40x40 Slot 8 system profiles, the goal can be easily screwed together and individually adjusted.
-
+
DIY saves costs: Building your own is often cheaper than ready-made goals and more flexible in size.
Planning & Dimensions for Your Aluminium Football Goal
Before you build your own football goal, you should decide on the appropriate size. For garden and leisure use, the following dimensions are common:
- 3.00 × 2.00 m – classic leisure goal
- 5.00 × 2.00 m – youth category
- 7.32 × 2.44 m – official full-size pitch goal
In this guide, we focus on a 3 x 2 meter aluminium football goal, which is ideal for private use in the garden, on the training pitch, or in leisure areas.
Which Aluminium Profiles are Suitable?
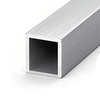
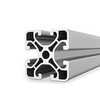
For construction, we recommend 40x40 Slot 8 system profiles. These profiles are stable, modular, and can be easily screwed together with suitable accessories.
- high stability with low weight
- easy assembly with brackets, T-nuts, and screws
- flexible expandability
- rust-proof and weather-resistant
The connection is made either via angle connectors, T-nuts, and screws or alternatively via a centering plate set – entirely without welding.
Material List for a 3.00 m × 2.00 m Football Goal
- 3 × Aluminium profile 40x40 Slot 8 of 3,000 mm each – front top, back top, and back bottom
- 4 × Aluminium profile 40x40 Slot 8 of 1,920 mm each – vertical posts
- 2 × Aluminium profile 40x40 Slot 8 of 920 mm each – side depth top
- 2 × Aluminium profile 40x40 Slot 8 of 960 mm each – side depth bottom
- 12 × Angle connector set 40x40 or alternatively 12 × Centering plate set
- 1 × Goal net as required
- Cable ties or hooks for attaching the net
- Optional: 4 × End caps 40x40
The front lower crossbar is intentionally omitted. This leaves the goal open at the front and allows it to be used like a classic football goal.
If the finished goal is to be exactly 2,000 mm high on the outside, the vertical posts must be correspondingly shorter due to the 40-mm profiles at the top and bottom. This results in a post length of 1,920 mm.
Tools Required
- Allen key
- Wrench
- When using centering plate sets: Drill and tap
- Optional: Rubber mallet for end caps
Matching Products for Your Football Goal
For a stable DIY aluminium football goal, 40x40 system profiles are suitable for the frame, matching connectors for the corner joints, and end caps for a clean finish of the profile ends.


Connection Comparison: Angles vs. Centering Plate Set
When building your aluminium football goal, you have two options: classic angle connectors or a centering plate set. Both variants have their advantages – depending on whether you prefer a simple DIY solution or a particularly clean professional connection.
💡 Alternative Solution: Connection with Centering Plate Set
In addition to classic angles, you can also connect your football goal with a centering plate set. This variant offers an invisible connection, high stability, and a particularly clean appearance.
Angle Connectors
-
✔ Easy Assembly
No profile processing necessary - ✔ Ideal for DIY & Beginners
- ✖ Angles visible on the outside
- ✖ Slightly less stable under high load


Centering Plate Set
- ✔ Invisible connection – no external angles
- ✔ Very high stability and torsional rigidity
- ✔ Professional appearance
- ✔ Particularly durable and resilient
-
✖ More complex assembly:
Drilling and tapping required


Conclusion: Angle connectors are ideal for quick DIY projects. For maximum stability, durability, and a clean appearance, we recommend the centering plate set.
Build Your Own Aluminium Football Goal – Step by Step
The assembly of your DIY football goal is done in several steps. Work as much as possible on a flat surface and regularly check the angles to ensure the frame remains perfectly rectangular.

1. Assemble the Front Frame
First, assemble the front frame. This consists of the upper 3,000 mm profile and two vertical posts.
- Lay out the profiles on a flat surface.
- Align the posts at a 90° angle to the upper cross profile.
- Screw the connections with angle connectors, T-nuts, and screws.
- The lower front crossbar is intentionally omitted so that the goal remains open at the front.
2. Build the Rear Frame
The rear frame provides stability and will later hold a large part of the net attachment.
- Build the rear frame from an upper and a lower 3,000 mm profile and two vertical posts.
- Again, ensure exact 90° connections.
- Initially tighten all screws lightly, align the frame, and then tighten them definitively.
3. Connect Front and Rear Frames with Side Sections
Now connect the front and rear frames with the side profiles.
- Insert the 920 mm profiles at the top between the front and rear frames.
- Insert the 960 mm profiles at the bottom, as no lower crossbar is installed at the front.
- Screw the side sections with angle connectors or centering plate sets.
- Ensure that all profiles are flush at the corners.
- Then check if the goal is straight and not warped.
4. Attach the Net
The goal net is attached to the front and side frames.
- Lay the net evenly over the back, sides, and top.
- Attach it to the profile with cable ties or suitable hooks.
- Tighten the net only slightly so that it is not unnecessarily under tension.
- Neatly trim any excess cable ties.
5. Optional: Mount End Caps
Finally, you can close the open profile ends with end caps. This provides a clean appearance and increases safety.

End Caps – Function & Advantages
End caps for aluminium profiles are placed on open profile ends. They are optional but particularly useful if the football goal is used in the garden or leisure area.
- Protective function: They prevent dirt, water, or insects from entering open profile ends.
- Safety: Open edges are covered, reducing the risk of injury.
- Appearance: The goal looks cleaner and more professionally finished.
- Durability: The profile ends are better protected from dirt and moisture.
The end caps can be easily and quickly attached to the profiles. To do this, the caps are inserted with the central pin into the through-hole of the structural profile.
If manual force is not sufficient, a light, gentle tap with a rubber mallet can help to fit the plastic cover flush into the profile.
Advantages of an aluminum soccer goal
- Rust-free & weatherproof – ideal for outdoor use
- Durable – significantly more durable than wood
- Lightweight – easier to move than many steel constructions
- Modular – expandable or adaptable at any time
- No welding required – all connections are screwed
Compared to wood, aluminum is much easier to maintain and remains stable even in rain and humidity. Furthermore, an aluminum profile soccer goal can be disassembled, expanded, or repaired if necessary.
FAQ on DIY Aluminum Soccer Goals
How do I build an aluminum soccer goal myself?▸
With system profiles, angles or centering plate sets, and screws, a stable goal can be easily bolted together. You don't need any welding – all parts are connected modularly.
Which aluminum profiles are suitable?▸
System profiles 40x40 Slot 8 are best suited. They offer a good balance of stability and weight and are easy to assemble.
What tools do I need?▸
For angle connectors, you primarily need Allen wrenches and spanners. For centering plate sets, you also need drills and taps.
Is a DIY soccer goal cheaper than buying one?▸
Yes, in many cases, building it yourself is cheaper. Additionally, you can customize the size, stability, and accessories.
What dimensions make sense?▸
For the garden, a 3 x 2 meter goal is ideal. It offers enough playing area and is still easy to handle.
Can I build the soccer goal without angles?▸
Yes, alternatively you can use a centering plate set. This connection is visually cleaner and more stable, but requires drilling and threading in the profiles.
What are end caps for?▸
End caps close open profile ends. They improve the appearance, protect against dirt and moisture, and reduce the risk of injury from open edges.

Author of this article
ABOUT
NILS
- Passionate about metal and aluminum
- Experienced product manager
- Solution-oriented and customer-focused
- Technically skilled and pragmatic
- Driven by digital innovation
