






DIY: Monitor riser for the home office
Build your own monitor riser with aluminum profiles
Reading time approx. 6 minutes
A monitor riser brings your screen to a more comfortable height and can make your workspace significantly more ergonomic. Especially in a home office or with a small desk, it helps relieve strain on your neck, shoulders, and back.
If you want to build your own monitor riser, you can individually plan the height, width, material, and storage space. Aluminum profiles are particularly well-suited for this because they are lightweight, stable, modern, and can be flexibly screwed together.

Key Takeaways
-
+
A monitor riser brings the screen to a more ergonomic height, relieving strain on the neck and back.
-
+
Aluminum profiles are lightweight, stable, modern, and ideal for custom DIY constructions.
-
+
A stable storage surface can be built using panels, square tubes, or system profiles.
-
+
Important considerations include appropriate height, sufficient load-bearing capacity, clean edges, and secure connections.
Why a monitor riser is beneficial
A monitor riser improves the screen's position and simultaneously creates more order on the desk. The monitor stands higher, while the keyboard, mouse, notes, or smaller office supplies can find space under the riser.
The main advantages:
- more ergonomic screen height
- less strain on the neck and shoulders
- more storage space on the desk
- tidier workspace
- individual adjustment to body size and desk height
- modern aesthetic with aluminum profiles
- stable construction for home office and office
Especially with prolonged screen work, an appropriate height can significantly improve comfort. The top edge of the monitor should be roughly at eye level so that you don't have to constantly look down or up.
Planning your monitor riser: height, width, and load-bearing capacity
Before building, you should precisely measure how high your monitor riser should be. Sit at your workstation and check at what height the screen is comfortable. The width and depth should also match the monitor base and the available desk space.
Important planning questions:
- How much should the screen be elevated?
- How wide and deep is the monitor base?
- How much weight must the construction bear?
- Should a keyboard fit under the riser?
- Should the riser be permanently screwed or remain flexible?
- What aesthetic suits the workspace?
- Should cables be managed or hidden?
For many desks, a riser between 8 and 15 cm is sensible. However, the ideal height depends on body size, chair, desk height, and monitor size.
What materials are needed?
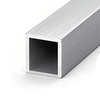
For a DIY monitor riser, you can use various aluminum products. Square tubes or system profiles are particularly practical because they enable stable frames and can be easily combined with panels.
Suitable materials:
- Square tubes for simple frame constructions
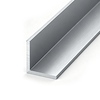
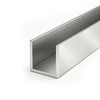
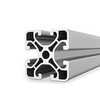
- System profiles for modular and expandable solutions
- Corner connectors for stable connections
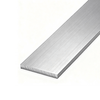
- Aluminum plates as a shelf surface
- End caps for open profile ends
- Screws, T-nuts, or suitable fasteners
- non-slip pads for the underside
The material thickness and profile size should match the intended load. For large monitors or additional devices, a more stable construction with cross braces is advisable.
Matching products for your monitor riser
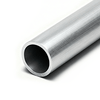
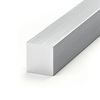
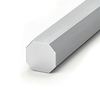
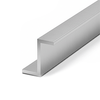
For a stable DIY monitor riser, you can use aluminum square tubes for the frame, matching tube connectors for the corners, and aluminum plates as the shelf surface.


Building your own monitor riser: step by step
Once the dimensions and materials are determined, you can begin construction. Many profiles can already be ordered to custom sizes, reducing the need for on-site cutting.
- Measure your workspace and determine the target height.
- Define the width and depth of the monitor riser.
- Select appropriate profiles and plate.
- Order profiles to size or cut them cleanly.
- Deburr and inspect cut edges.
- Assemble the frame with corner connectors or profile accessories.
- Secure the plate as a shelf surface.
- Place end caps on open profile ends.
- Attach non-slip pads to the underside.
- Set up the monitor and test stability.
Before permanent use, you should carefully load the construction and check if it stands securely. Especially for large monitors, a wide base is important so that the monitor riser does not tip over.

Improve ergonomics at your desk
Good monitor height is an important component for ergonomic work. The screen should be positioned so that you can look straight ahead with a relaxed head posture. This reduces strain on your neck, shoulders, and back.
You should pay attention to:
- Align the top edge of the monitor approximately at eye level
- Maintain sufficient distance from the screen
- Position the monitor centrally in front of your body
- Avoid glare from windows or lamps
- Place keyboard and mouse within comfortable reach
- Also check chair and desk height
The monitor riser alone does not replace an ergonomic workstation, but it can be a simple and effective improvement. Especially in the home office, it can quickly create a more comfortable working position.
Tips for stability, aesthetics, and function
A monitor riser should not only look good but also remain stable long-term. Therefore, pay attention to secure connections, appropriate profile strengths, and a sufficiently large base area.
Practical tips:
- plan a wide base to prevent tipping
- add cross braces for larger widths
- deburr edges cleanly
- use end caps for open profile ends
- route cables with clips or hook-and-loop fasteners
- attach non-slip pads under the frame
- test load before use
- if necessary, plan a second shelf level
If you want a particularly high-quality look, you can use anodized or coated profiles. You can find more about surfaces in the article Surfaces.
Further Information
These pages will help you with material selection, processing, and accessories:
FAQ on monitor risers
Why build your own monitor riser?▸
A self-built monitor riser can be precisely adapted to your desired height, width, and appearance. You can also plan additional storage space for your keyboard, notes, or accessories.
What materials are suitable?▸
Suitable materials include aluminum profiles, square tubes, wooden panels, aluminum plates, or multiplex. Aluminum is particularly lightweight, stable, and modern.
How high should a monitor riser be?▸
Typically, the appropriate height is between 8 and 15 cm. The key is that the top edge of the monitor is approximately at eye level.
What can be used instead of a monitor stand?▸
Books, boxes, or small shelves can serve as a simple solution. However, a custom-built monitor riser made of aluminum profiles or wood is more stable and visually cleaner.
Can I use aluminum?▸
Yes, aluminum profiles are very well suited for monitor risers. They are lightweight, load-bearing, can be securely screwed together, and visually complement modern workstations.
How stable is a DIY monitor riser?▸
That depends on the profile size, connectors, width, and load. With appropriate profiles, cross braces, and a wide base, a very stable construction can be built.
Can I use the space underneath for storage?▸
Yes, you can store your keyboard, mouse, notes, or other accessories under the monitor riser. Plan the height and depth accordingly.

Author of this article
ABOUT
NILS
- Passionate about metal and aluminum
- Experienced product manager
- Solution-oriented and customer-focused
- Technically skilled and pragmatic
- Driven by digital innovation